Showing posts with label guest blogger. Show all posts

9.23.2010

WHAT INSPIRES YOU?

I get asked all of the time what inspires me? The answer is simple: ANYTHING! It can be the color of the sky when the sun in setting, some new towels at Target, or my boys sitting on the floor playing with a group of cars! Erika, of BluLabel Bungalow wrote this post a while back when she was preparing to change her daughters nursery over to a "Big Girl" room! What I like the most is that her inspiration came from an outfit!

Ava Grace is now 2 years old and has outgrown her little crib...yet, another reason to redecorate! Items chosen for her room will grow with her through her grade school and teenage years plus or minus a few accessories! I love the challenge of translating fashion into stylish and livable spaces. Here's the adorable inspiration outfit (from Gymboree) chosen for this design...


Isn't that inspiration board AMAZING! All that from one little outfit! Erika is great at putting rooms together that starts from a favorite outfit!

What inspires you? Have you ever been inspired by something as simple as an outfit?! Do you have a favorite outfit that you wish could be transferred into the design of a room? Contact Erika Ward: Erika@Blulabelbungalow.com

Photobucket

9.22.2010

GETTING BACK TO BASICS

Hi guys! I'm returning home today and I know that my house is going to be less than par since I left my hubby in charge of three boys! So it was funny when Tonia sent me her guest post talking about cleaning your home! Maybe she was hinting at something;-)


header 2


Hello there people, Tonia here from Chic Modern Vintage. I’d like to say that I’m taking an impromptu trip to some exotic locale, but that is not the case. Ms. LaKeitha is in New York and I’m filling in while she’s out. We all like to discuss how to decorate, and what to use to decorate. I like to get down to the bare basics of great decorating. 


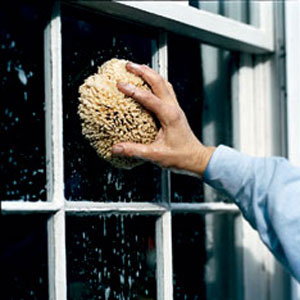
I was speaking to a long time family friend the other day, we discussed bed bugs. Yes, bed bugs. She asked, “You remember when, your Grandmother use to take all the mattresses out, and lay them out in the sun?” Then she went on and asked, You remember when she would have everybody in the house cleaning windows?”


Here are three things to add a bit of spark to your home this Fall. Things that my Grandparents did when to keep their home in tip top shape. It will only cost you a bit of sweat.


Clean windows let tons of glorious light in. Try a good cleaning inside and out twice a year. In the Fall and then again in the Spring.


It’s a bit of a hassle and might be considered a bit weird, but laying your mattresses out in the sun, will freshen them up. We never had bed bugs either.


Fall is a great time to clear out things out, and get organized. Donate usable unwanted items. This way you’re not overwhelmed when Spring comes.


These are things we all know to do but sometimes they are overlooked or maybe not mentioned. A good clean and organized home is really the first layer of decorating.


Thanks so much LaKeitha for asking me to fill in while your off gallivanting in New York. I hope your having a fabulous time in New York City. Can I get a key chain, please?


Great tips Tonia! I laughed at the thought of me putting the mattress outside for a while! My husband would not only think I'm crazy, but he would probably check into a hospital too! Have any of you ever put your mattress out in the sun for a while? Do you have any cleaning rituals that you do with the change of the season? I'd love to hear them!

Okay, so I'll be home later today! I may be able to post tomorrow or I may wait until Friday after I've gotten some rest...I can't wait to share everything with you!


Photobucket

9.21.2010

BOARD AND BATTEN: A Tutorial

The oh so talented Emily (Decor Chick) is here today to show us how she made her own version of board and batten for a room in her house. I must say, I love the look of board and batten and have wanted to try it for some time now. I know you've seen it many places and I swear the tutorial on how to do it just keep getting easier and easier! Don't believe me? Keep reading!


To satisfy my love of all kinds of different styles and colors, I decided to do board and batten on the one big wall in our upstairs multipurpose room. :) The upstairs will have a different vibe than the downstairs, and I think that's so fun! Probably a design rule no-no, but I don't follow rules. :)

I know I just showed you all the other day what this room looked like, but here it is again.


And new paint and several battens later, here it is now (remember this room is not decorated yet)...


I'm singing "Isn't She Lovely" right now. :)

This was a very easy project and went very smoothly, but I say that because I had the guys at Home Depot cut it all. Haha. I wasn't charged for the cuts though! I took all of my measurements with me, and decided to go with the lattice strips for the battens like Thrifty Decor Chick did in her big boy's room. One, because they are cheap, and second, because they don't stick out from the baseboards. I'll show you in a bit how they sit perfectly on top of the baseboards. She really is a clever gal!


BUT wait, I think I was pretty clever too because I thought to use a thick door casing that looks like nice molding instead of a plain wood board going across. Why you ask? Well, because it's more decorative, AND because it gives me the plate ledge to display pretties on! I'll show you that further down too. I haven't seen anyone do this, but if you have, you are very smart. :)

The lattice I used for the battens at .66 per foot...


And the casing I used for the board at $1.50 p/ft.


I had each batten cut 4 1/2 ft tall. My wall is 17 ft and 1 inch long, so they cut 2 of the casing boards to get it the right length so I could just joint them together. Everything fit perfectly when I got it home. I love that!!

So all of this was only $70.00


Not bad! And no those aren't my calves in that photo. I sure wish they were though.

I put all of the battens up with tape until I could nail them all in with the super cool nail gun. I spaced them 12 inches apart, and used a spacer that size to make it easier.


And whenever I hit an outlet, I just simply "jumped" it like it wasn't there. :) I know my Dad is cringing right now at my mathematical spacing skills, or lack thereof, but that's ok because it doesn't bother me. So yes, a few of my battens aren't exactly 12 inches apart, but most of them are. :) A quote from my Dad, "I prefer uniform spacing, but you like the occasional random placement." Yes Dad, you finally understand me!!

Here are the battens all up.


And with the board (casing) on top...


See how perfectly they fit on top of the baseboards?


Awesome!

Then it was just a matter of caulking, painting it all out with a semi-gloss white paint, and more caulking, so here are lots of pictures. The paint for the walls is Sherwin Williams "Oyster Bay." LOVE this color. It's a nice blue/gray, and really love it at night. Lots of gray comes through. I almost went all gray but chickened out. My heart said blue-gray. :)

Shut me up already!!


And my favorite part...THE LEDGE THAT WAS ALREADY DONE FOR ME!!


And that's it folks! I hope this little tutorial was enough oomph for you if you have been wanting to try this. This was a very easy project I promise!! Did I mention I did EVERYTHING all by myself, paint and all??! My husband did help me touch up the paint all around the room thank goodness, because I was d.o.n.e. with paint. Painting ceilings is hard. Well not really hard, just a pain. He also took care of little girl so I could "get er' done!" That was a huge help.

And no, of course this isn't "true" board and batten, but it's a heck of a lot cheaper and looks just fine to me!

Now comes the fun part...decorating the room! :)


Now who is going to try this in their home besides me?! I love the look of board and batten and for 70 bucks for this project, its certainly worth giving a try! Thanks again Emily for that amazing tutorial!



Photobucket

5.28.2010

GUEST BLOGGER: CHIC LITTLE HOUSE

Hi guys do you miss me yet?! Don't worry, I'll be back next week with lots to share with you! Right now I want to introduce Mrs. Chic! Her and her husband are some great DIY'ers who pretty much tackles everything themselves when it comes to their home. I figured todays post would be great given that this is Memorial Day weekend and a great time to spruce up your home for summer! Take it away Mrs. Chic!


Thanks Lakietha for having me guest post today. It’s my first time guest posting and I’m very excited. I’ve been reading Home to three Duncan Boys for months, and I’m always amazed by all the projects Lakeitha’s able to get done with three little ones running around.

For those of you who are not familiar with my blog Chic Little House, my husband and I purchased our little 1956 rancher in Northern, California in December 2008. Since then we have completed many projects around our house {inside & out}. With the weather warming up, I thought I’d share with a two projects that you can tackle around your home that will make a big impact.

Everyone knows the power of paint and how it can transform a room or an old desk. Not only can paint transform a room it can work wonders on the outside of your house. One of our first major DIY projects we tackled was painting our house. I know what you’re thinking that’s way too much work, but trust me if you can paint honey oak trim, you can paint your house too!
A couple of reasons why we choose to go the DIY route is: saving money, we have a one story, and there’s that satisfaction of a DIY project. If you think about it, most DYI projects don’t cost that much. Why? because you’re saving on the labor. We estimated having our house professionally painted in the area we live in would have cost us $ 1500.

Our home on painting day


Tips for painting your house yourself:

*pick your paint colors in advance, think of the trim, garage door, front door, eves color.

*walk around your neighborhood during different times of the day for inspiration. Most home look good with a color palette of four of more colors. Our house has 5 colors: grey exterior, white trim, black shutters and red wood, wood trellis.

*Check out the outdoor paint color booklets at your local home improvement store, most paint companies have great color combinations.


Just like painting a desk, your house requires prep work. Here are some items you may need:

*broom to remove cobwebs
*ladder
*paint sprayer (we rented ours)
*caulk for wood siding
*roller and paint brush

Remember to tape off your windows and watch for over spray. We got lots of help from my dad and his girlfriend and had so much fun paint our house! So invite friends over and have fun.

Our Home Now


Budget Breakdown for painting our house around $ 300.

we spent around $ 155 on paint (and had leftovers that is perfect for touchups)

$100 for paint sprayer for 24hrs

remaining money went on misc. items like paint supplies, shutters and house numbers

Another way to make a big impact without painting the entire house, is painting your front door. We recently painted our front door a cheery red!


Another project that really improved the look our house was installing sod ourselves. We got a quote from our landscaper who installed our sprinkler system in the front yard. He wanted to charge us $400 just for the installation, which was more than our sprinkler system with labor cost! So we went the DIY route. Are front yard is approx. 1000sq my husband installed the entire yard himself! I wanted to help but each roll was too heavy for me.
We order 2 1/2 pallets of sod


Here are a few tips for getting a deal and laying sod:


*Call around to sod farms and see if you can get free delivery. Some places will deliver for free if you reach a minimum square foot amount.

*When you lay your sod stagger your seams, and make sure you lay them tight.

*When laying over a sprinkler head use an exact o knife to make a sit. That way when the sprinkler head is lowered, it will disappear. Laying sod is hard work, but the transformation is amazing!

Thanks again Lakeitha for having my guest post. It's been fun sharing our DIY projects with your readers!

Thank you Mrs. Chic (oh and I can't forget the Mister)! You guys did an amazing job of sprucing up your house! I love the red door and how it just pops out against the house! Are any of you doing any outdoor entertaining this weekend? Do you plan on sprucing up your outdoors? If so, I want to hear your plans!

Have a great holiday weekend everyone! "See you" next week!


Photobucket

5.26.2010

GUEST BLOGGER: CHIC MODERN VINTAGE

Hi Everyone! Okay so it's day three of my time away and I can't wait to share with you what I've been up too! But, on the other hand, I'm really starting to feel a little spoiled by my guest bloggers! Today I would like for you to meet Tonia.
Tonia is a woman after my own heart! She is constantly finding great pieces at her local thrift shops. She is here to share some of her tips to striking gold on your next thrifting excursion. Take it away Tonia!


When LaKeitha asked me to be her guest, I thought long and hard about what I would talk about. My mind went all over the place trying to think of something. Then it hit me like a ton of bricks, thrifting; it’s what I do best. So I’ve complied a few hints and tips, some you know and a few you may not.

If you have not been thrift shopping yet, then I encourage you to try it. Most people picture dingy floors, clothing piled on a table, and funny smells. In every town there are a few like that and those are the ones I like most. Thrifting is a fabulous way to stretch your dollar.

1. Have a Plan and keep an open-mind
Know ahead of time what you need. You cannot go “thrifting” without knowing exactly what you are looking for. With that said, Look-out for any other hot items. {i.e. campaign-style furniture} It’s always a hit-or-miss when it comes to thrift stores. You can sometimes hit the jackpot, but make sure what you find is actually something you need, otherwise you’re just buying clutter, and you’re not saving money at all.

Found for $40


2. Look for designer brands and consider alterations
You would be surprised at the higher end labels that are lurking on the racks. I’ve found labels such as Prada, Carolina Herrera, and Lanvin. Don't forget about handbags as well and always try things on, but don’t overlook great quality pieces because they're too big. Its worth having alterations done. If it’s a label you’re not familiar with, and it’s a great piece, it could be a European brand that you’re not familiar with. If you have one of those "smart phones" you can always Google unfamiliar labels. I know I do!

Found at Salvation Army for $9


3. Leave the kids at home
Most times than not you’re sifting through aisles that are full racks of clothing and household items. Children become bored and tired easily when you are not doing anything that they are interested in, so leave them at home or with a sitter. If you have to take them with you bring lunch with you, so you don't have to worry with finding a place to eat.

4. Know the Sale Days
Salvation Army stores have half-off all clothing on Wednesdays. Goodwill offers half off their clothing on certain color tags, each week. You would need to check with your local store for exact details.

Found at Goodwill for $12


5. Make a friend
You don’t expect them to bend over backwards but if you’re friendly each time you visit, and address them by name they’ll surely remember you over time and may give you a call when something hits the store you might have interest in.

6. Have cash and go often
If you don’t find anything one week, go the next week. Inventory changes often. When paying in cash you will be more selective on the items you purchase. Have a budget and stick to it, yes even thrifting.


7. Have your own bags and boxes
Have your own boxes, bags, tissue paper and/or bubble wrap for those delicate breakables you might be purchase. Nothing like finding a fabulous piece, get it home and it’s broken. I re-wrap things and place them in a box in the trunk of my car so they don’t get broken. Especially if I know I’m going to be out most of the day.


...and don't forget the hand sanitizer! It's a must.

I hope these tips help someone that maybe new to thrifting.
Thank you Lakeitha, for allowing me to do my very first guest post with you.
I hope you’re having a well deserved vacation with your family. See you on next week.


Thanks Tonia for the tips! I have a question; Can I have the purse and the dresser?!

So, what do you guys think? Were these tips helpful? Do you have your own to add? I want to hear it!